How to install the Channable Feed extension through FTP
You can start the installation by downloading the Channable Feed package (.zip) file from your dashboard-account under my downloads and follow the installation instructions below.
Note: Creating a backup is recommend and will allow you to revert back to a previous version of your Magento files if something unexpected happens during the extension installation. If this is your first backup, take additional care to verify that the backup is both complete and functional by performing a trial run of your recovery process.
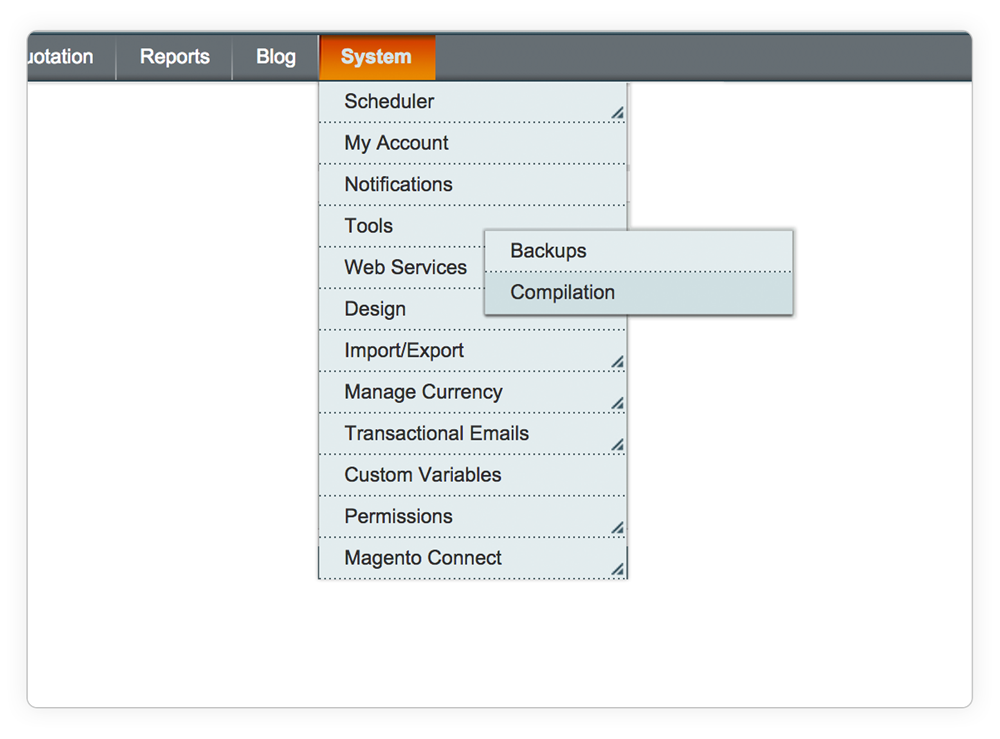

Navigate to System > Tools > Compilation.
Check and see if Magento’s compilation mode has been enabled. If it has, it is vital to turn it off beore installing an extension (or making any code changes).
Note: In the worst case scenario, not disabling compilation mode before installing an extension could make your site inaccessible (including the admin area) so please check if it's disabled for sure.
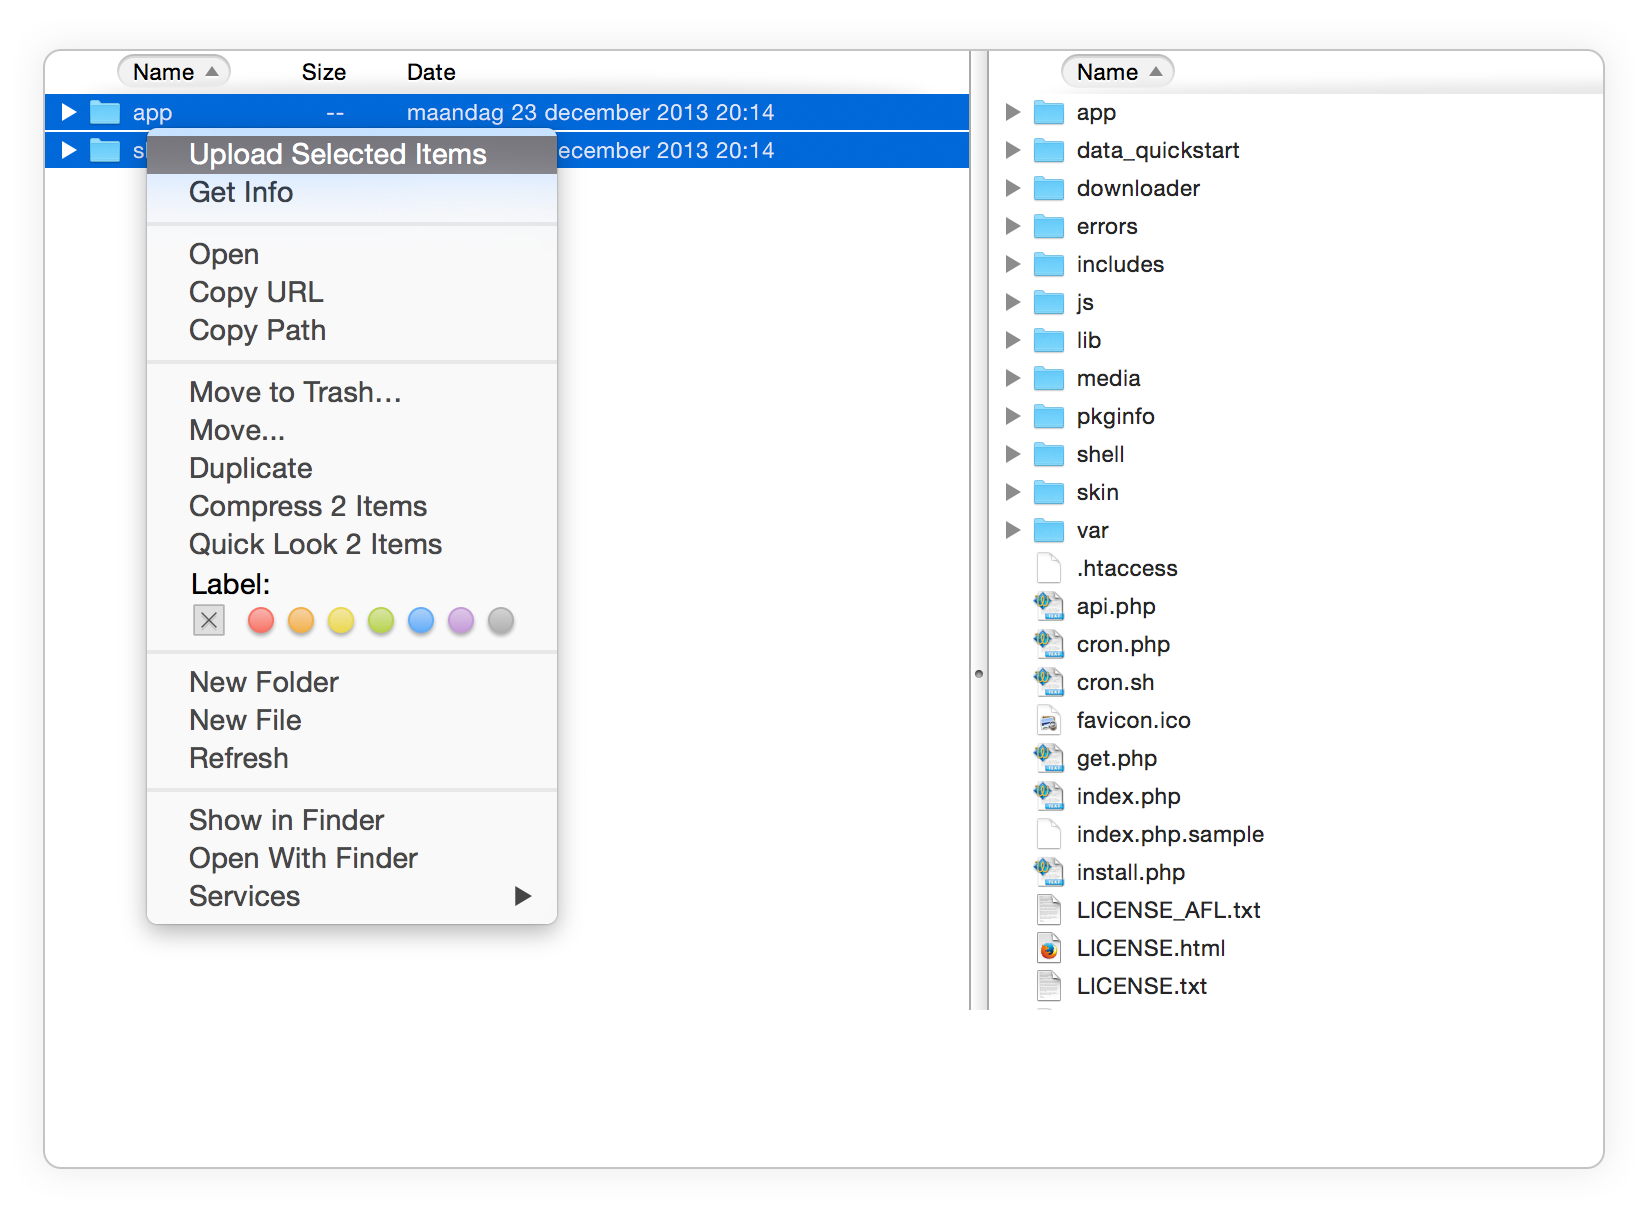

Extract the Channable Feed ZIP-file (using Winzip, WinRar, etc) and upload the folder(s) to the root directory of the Magento installation. (You should not upload any other present folders within the supplied zip file, only these directory, the folder(s).
All folder(s) should match the existing folder structure. If one of our extensions is already installed and you're updating it, make sure to overwrite the existing files of the extension.
Note: Warning for Mac OS users using Transmit. If you are installing the extension in a local environment or you are using Transmit, make sure to merge and not to replace the existing folder's contents. Otherwise, your app folder will be gone.
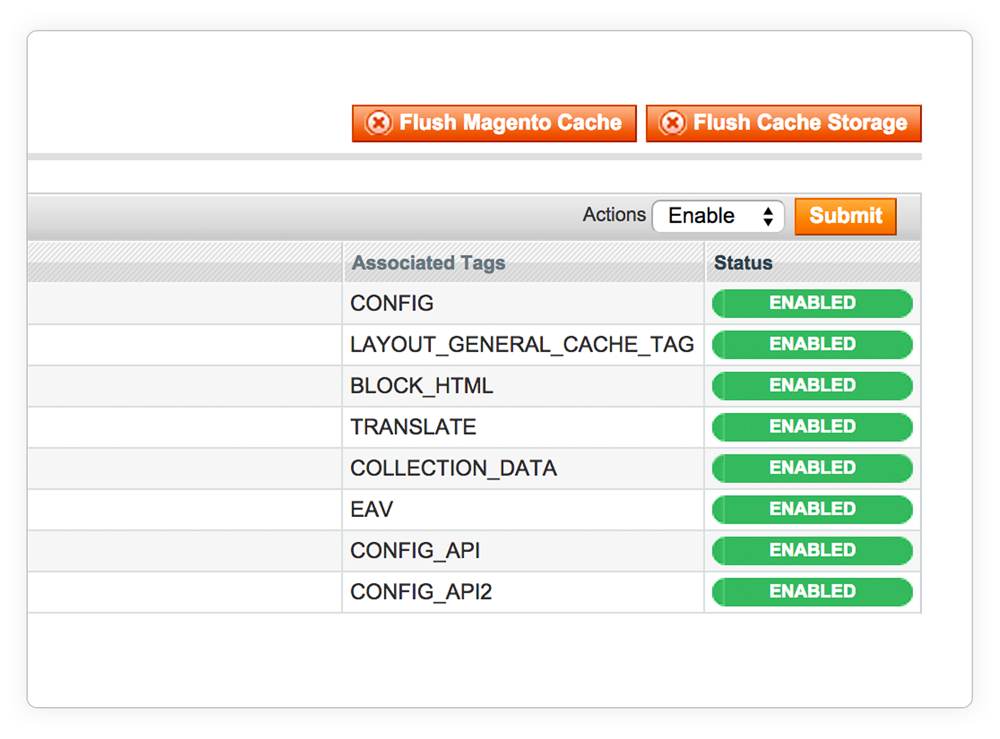

Turn on Magento’s configuration cache – this will prevent Magento from trying to install the new extension too early. If the extension needs to make any database changes, triggering the installation too early could cause it to miss some database changes and create errors which are difficult to fix later on.
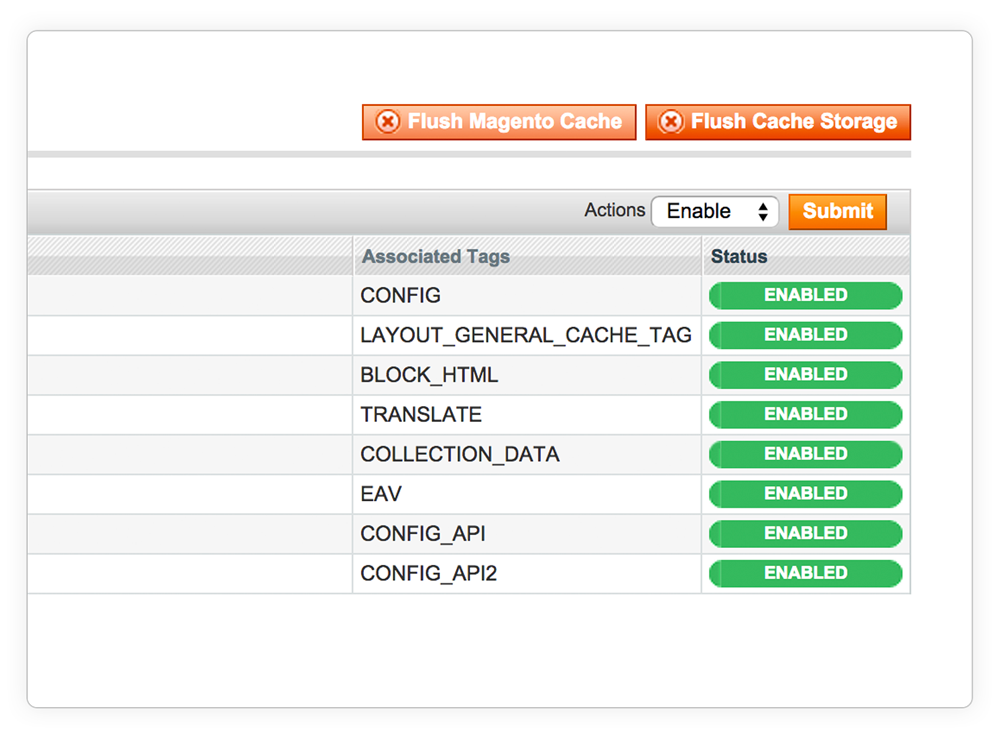

Go to System > Configuration > Cache Management and click both the 'Flush Magento Cache' as well as the 'Flush Cache Storage' button. This is required to activate the extension.

Now, log out and log back into Magento to reload any access rules for the back end and to prevent a potential "Access Denied" error. Magento might display a 404 Error as it needs to create new permissions for this module in the session. This is done when logging back in to the admin panel.
