Configure the Rich Snippet Suite extension


After the installation, the Rich Snippet Suite configuration will show up under the Configuration -> Magmodules section.
From here you can use the Selftest to make sure that your Magento 2 store is fitting the requirements to run the plugin smoothly.
Version
Shows the version that you have currently installed, hit the check button to see if that is the latest version.
Enable
Enable the plugin on global or on the store-view level.


Set the store information as JSON Rich Snippet markup.
Sitename
Fill in your official company name for the Sitename markup.
Alternative Sitename
Be reasonbly similar to your domain name. Be a natural name used to refer to the site, such as "Magmodules," rather than "Magmodules, Inc.". Be unique to your site and not used by some other site not be a misleading description of your site.
Logo URL
Fill in the full URL of your store logo.


Use structured data markup on your public website to indicate the preferred name you want Google to display in Search results. You can also provide more than one possible name for your site, and let Google Search algorithms choose between them. Also part of this schema is the Sitelinks Search Box that displays a searchbox directly in the SERP.
Enable Sitename
Select if you want to use the Sitename in the Rich WebSite markup.
Enable SiteSearch
An improved search box within the search results. When shown, it will make it easier for users to reach specific content on your site, directly through your own site-search pages. This code is limited to the homepage.
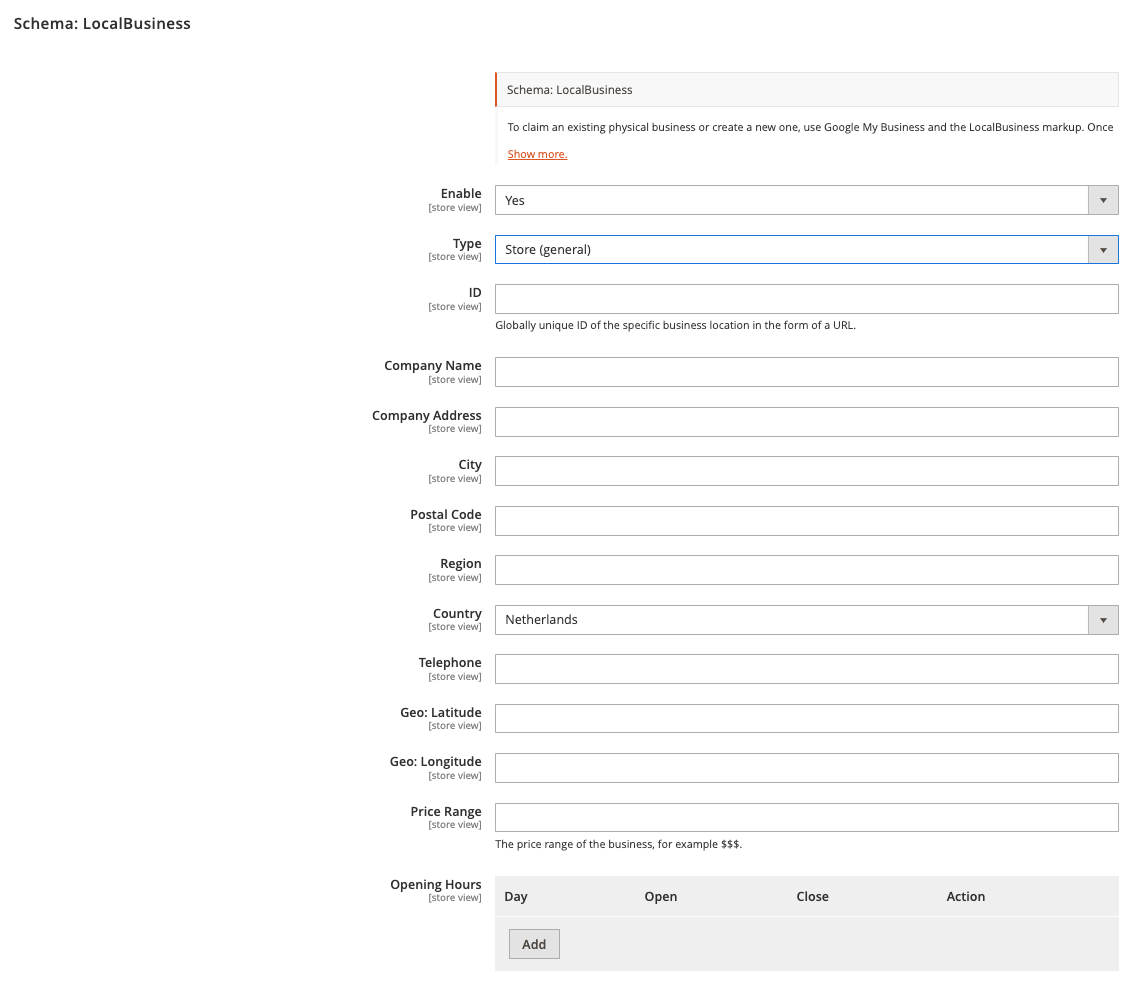

To claim an existing physical business or create a new one, use Google My Business and the LocalBusiness markup. Once you verify yourself as the owner of a listing, you can provide and edit your address, contact info, business type, and photos. This enables your local business information to show up in Google Maps and in Knowledge Graph cards.
Enable
Select if you want to use the local business schema
Store (general)
Select the store type from the dropdown
ID
Globally unique ID of the specific business location in the form of a URL. So basically this is the exact URL for your store-view.
Company Name
Add your company name how it's shown in Google
Company Address
Enter your company address
City
Enter the city where your business is located
Postal Code
Enter the PostalCode where your business is located
Region
Enter the region where your business is located
Country
Enter the PostalCode where your business is located
Telephone
Enter the phone number of your company
Geo: Latitude
Get your GEO data here.
Geo: Longitude
Get your GEO data here.
Price Range
The price range of the business can be exact numbers but in the priceRange field, you can also enter $, $$, or $$$ if you don’t want to use a specific number.
Opening Hours
Enter the opening hours of your business.
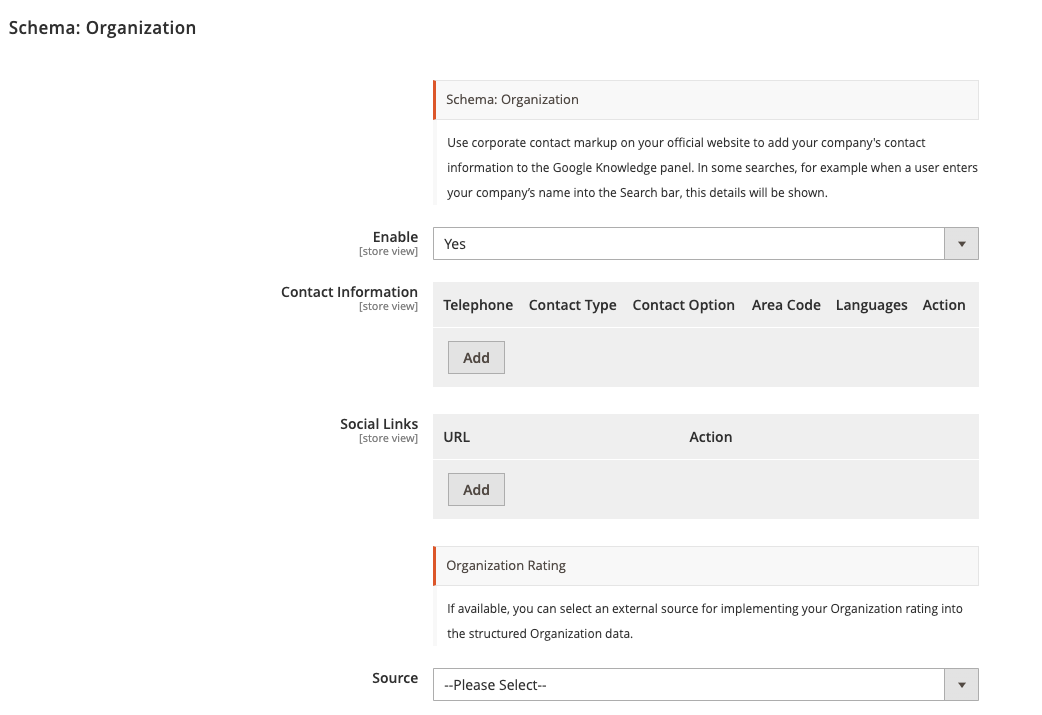

Use corporate contact markup on your official website to add your company's contact information to the Google Knowledge panel. In some searches, for example when a user enters your company’s name into the Search bar, this details will be shown.
Enable
Enable the Organization markup to enable the option fields for the Rich Organzation markup.
Contact Information
Add the Telephone, Contact type, Contact Option, Area Core and Language.
Social Links
Add the Social links for all your social media networks.
Organization Rating
If available, you can select an external source for implementing your Organization rating into the structured Organization data.
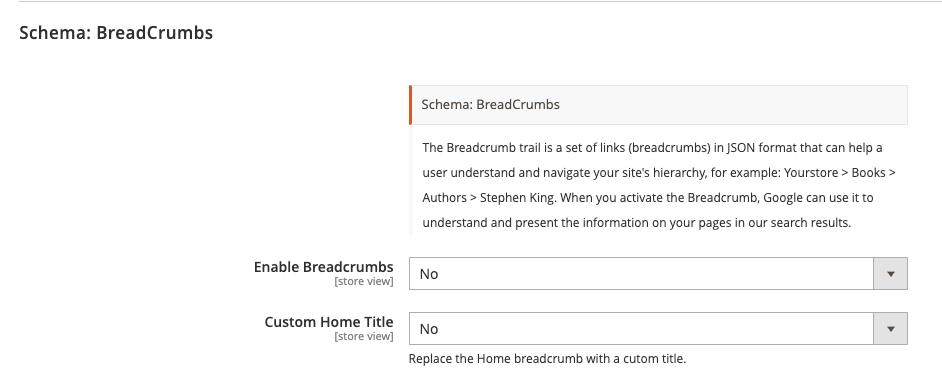

The Breadcrumb trail is a set of links (breadcrumbs) in JSON format that can help a user understand and navigate your site's hierarchy, for example, Your store > Books > Authors > Stephen King. When you activate the Breadcrumb, Google can use it to understand and present the information on your pages in our search results.
Enable Breadcrumbs
Set if you want to enable the Breadcrumb markup.
Custom Home Title
If set to yes a new text field appears where you can set your own custom title.
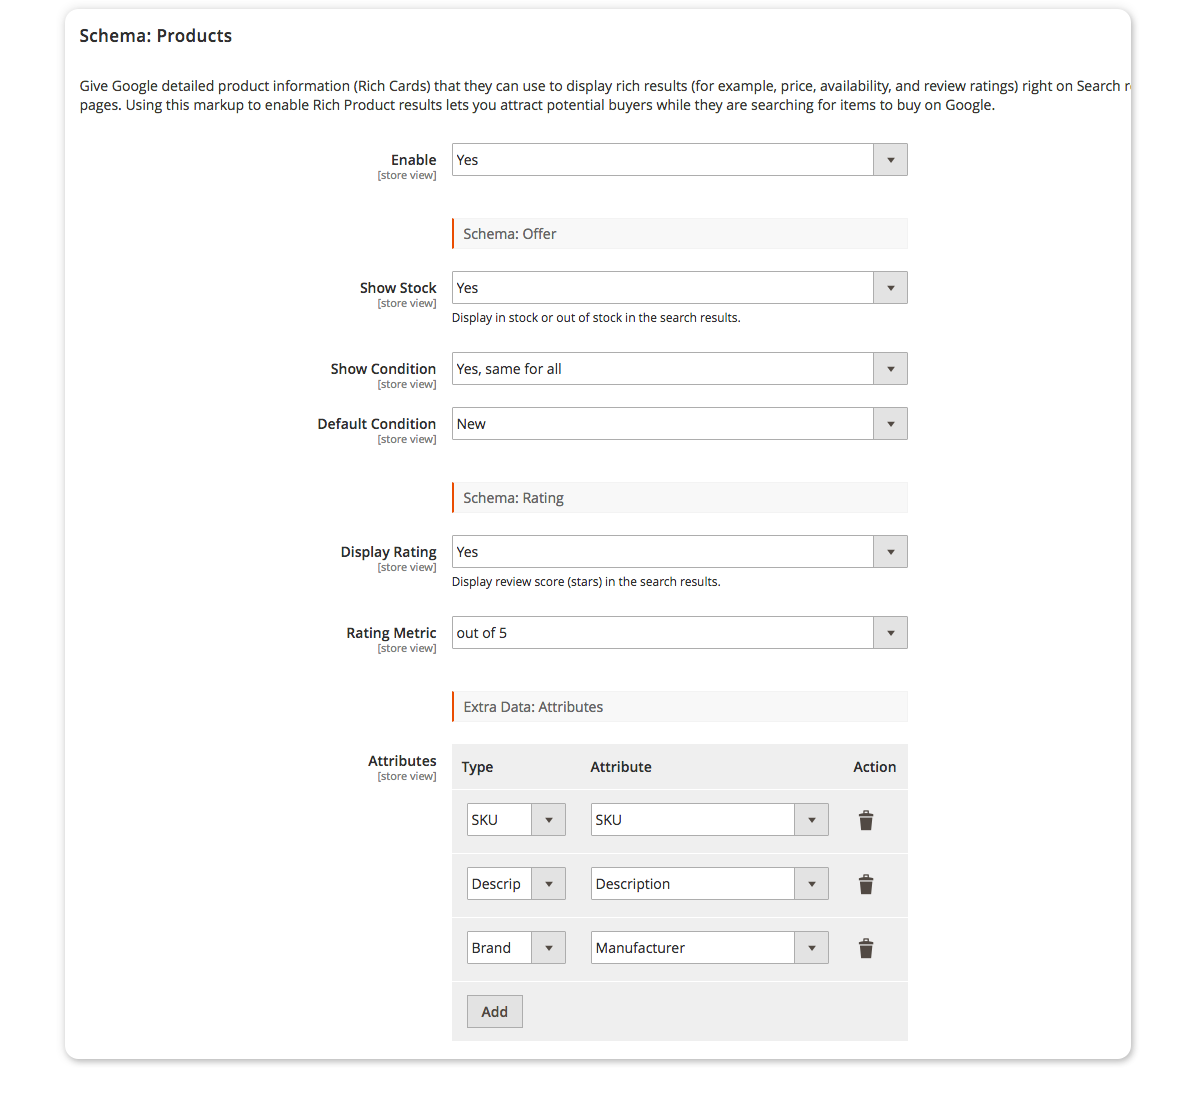

Give Google detailed product information (Rich Cards) that they can use to display rich results (for example, price, availability, and review ratings) right on Search results pages. Using this markup to enable Rich Product results lets you attract potential buyers while they are searching for items to buy on Google.
Enable
Enable the Product markup to enable the option fields for the Rich Product Markup.
Schema: Offer
Show Stock
Display in stock or out of stock in the search results.
Show Condition
Set the condition for your products, select "Yes, same for all" to use the same value for all products or use a attribute that you can use on product level.
Default Condition
If "Yes, same for all", set the attribute.
Schema: Rating
Display Rating
Display review score (stars) in the search results.
Rating Metric
Select if you want to show the rating based on 100 or based on 5.
Extra Data: Attributes
Type
Select the supported Rich Snippet data to connect them with the right attribute.
Attribute
Based on the chosen attribute type, select the right attribute for that value.
Action
Add or remove a attribute row.
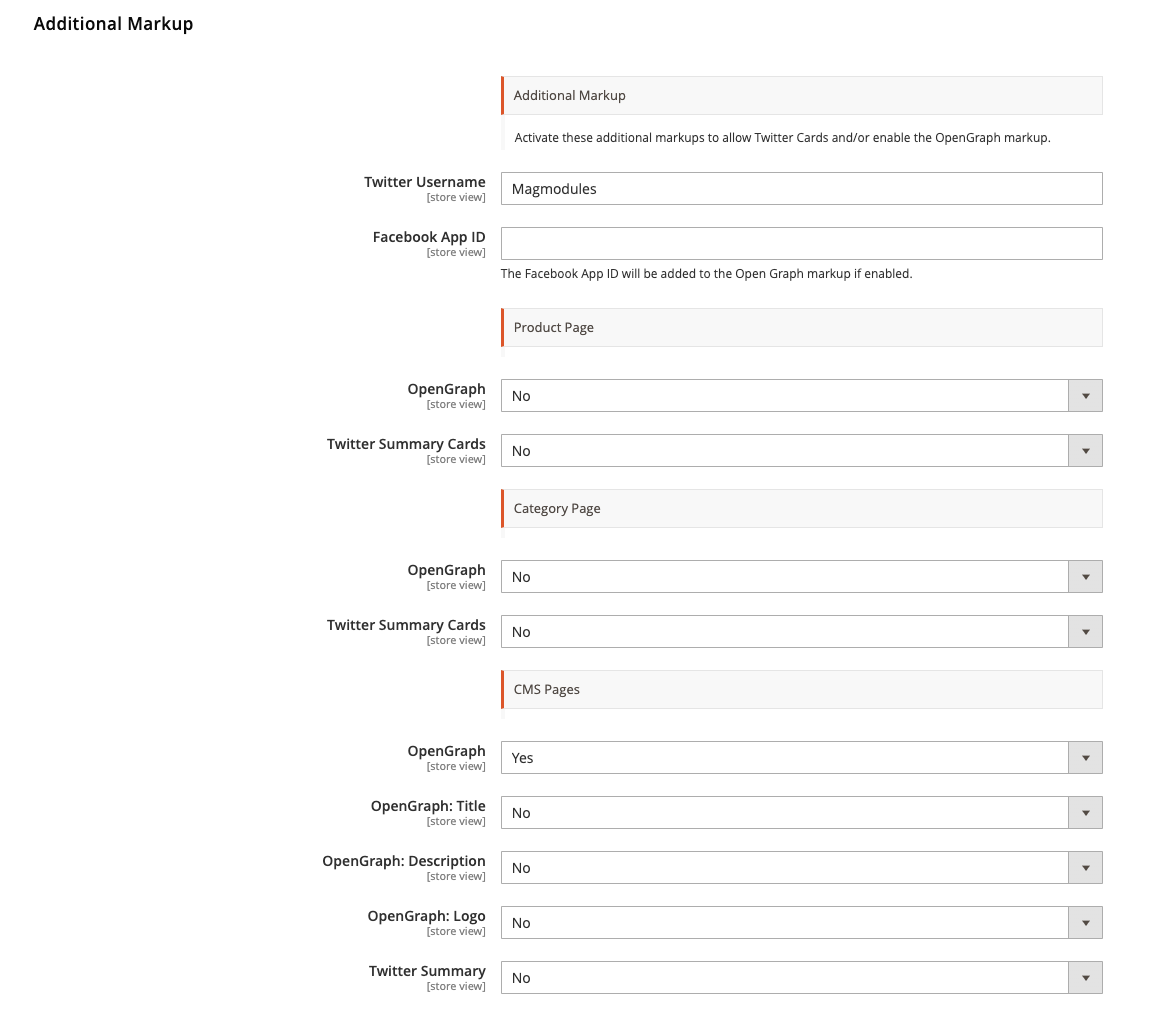

Activate these additional markups to allow Twitter Cards and/or enable the OpenGraph markup.
Twitter Username
Set the username from your Twitter
Facebook App ID
The Facebook App ID will be added to the Open Graph markup if enabled.
Product Page
Enable/disable the following values on the product pages;
- OpenGraph
- Twitter Summary Cards
Category Page
Enable/disable the following values on the category pages;
- OpenGraph
- Twitter Summary Cards
CMS Pages
Enable/disable the following values on the CMS pages;
- OpenGraph
- OpenGraph: Title
- OpenGraph: Description
- OpenGraph: Logo
- Twitter Summary


In case you are using the LUMA theme, it could happen that the Structured data is there by default. Unfortunately, the LUMA Rich Snippet Markup is not right and/or not completed, especially for Configurable and simple product prices where all variants should be shown in the Snippet MArkup. With his function, you can easily disable this markup from the Theme so only the Rich Snippets from our Snippet Suite are shown.
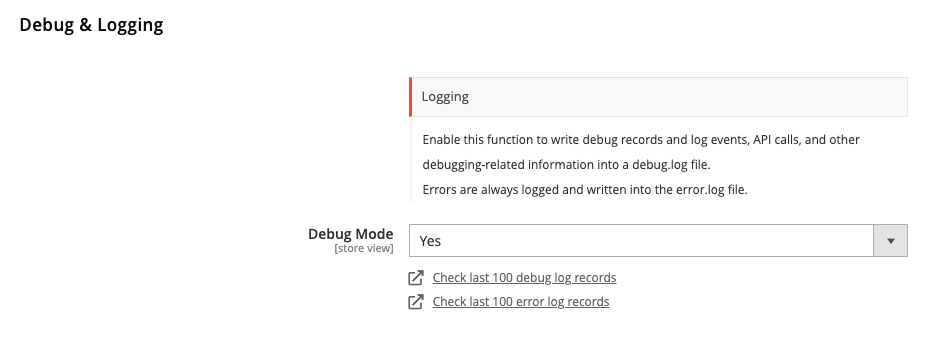

Enable this function to write debug records and log events, API calls, and other debugging-related information into a debug.log file.
Errors are always logged and written into the error.log file.
Debug Mode
Set to yes to write all debug log rules to the logfile.
Check last 100 debug log records
Shows a popup of the last 100 records of debugging.
Check last 100 error log records
Shows a popup of the last 100 records of errors.
